Next Steps
Installation & Registration
Install the app from your device's app store. There are buttons above that take you directly to the app store for Android and iPhone.
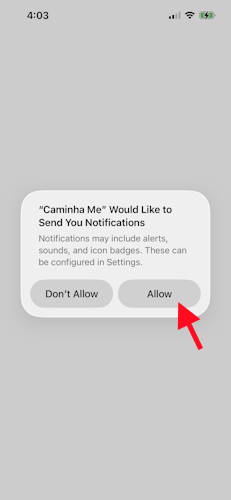
Installation Permissions
Notifications are an integral part of Caminha.me.
This is a one-time permission to allow notifications which can always be revoked at a later time.
Press the Allow button.

Installation Permissions
Access to your location and GPS system on your mobile device is at the heart of Caminha.me
This is a one-time permission to allow location sharing which can always be revoked at a later time.
Location sharing allows you to check-in; without it, you will only be able to follow friends and companions.
Press the Allow While Using App button.

Registration Step 1
The first registration page is where you start the process of registering your device.
If anything goes wrong during this process, simply return to this page to reset.
Press the Register By Phone button.
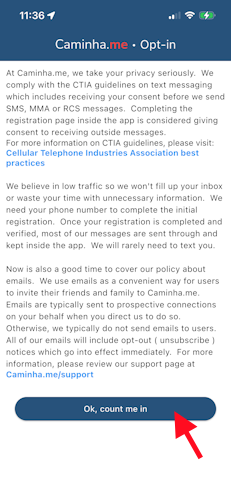
Registration Step 2
This is the necessary legal requirement for “opting in” to receive text messages.
The registration process will send you a text message to verify your phone.
The number of text messages you receive from us will be minimal.
Press the Ok, count me in button.
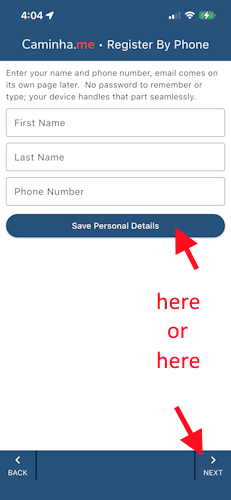
Registration Step 3
Enter your first and last name along with your phone number.
This must be a valid phone number that can receive text messages.
We will send a verification code to this phone number on the next page.
Press either the Save Personal Data or the Next button.
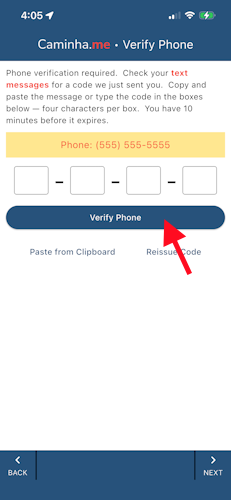
Registration Step 4
You will receive a text message with the verification code.
Copy the whole message and paste it into the first box or press the “paste from clipboard” button.
On the iPhone - Tap the message when it appears.
This will take you to the messages app where you can copy the message.
On some samsung phones - Long-press the message when it appears.
The phone will go into split screen mode.
Copy the message and then paste it into the first box.
The system will locate the code and paste it into the four boxes.
If you mistyped the phone number, use the back button to return to the previous page and correct the number.
Press either the Verify Phone or the Next button.
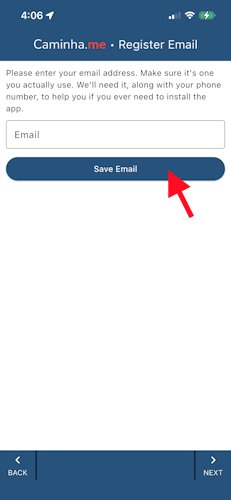
Registration Step 5
Enter a valid email address.
We will send you a verification code to this email address on the next page.
Press either the Save Email or the Next button.
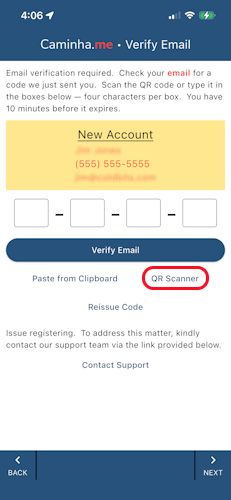
Registration Step 6
You will receive an email message with the verification code.
Email on the same device - Copy the whole message and paste it into the first box or press the “paste from clipboard” button.
Email on a different device - Press the “QR Scanner” button.
Scan the code and the system will paste it into the four boxes.
If you mistyped the email address, use the back button to return to the previous page and correct the address.
Press either the Verify Email or the Next button.
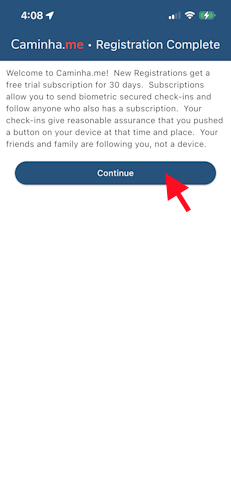
Registration Step 7
Congratulations! You have completed the registration process.
Press the Continue button.
Connect with a Friend
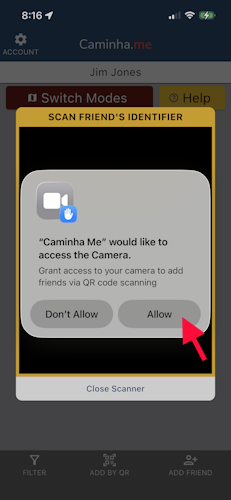
Camera Permissions
The camera is needed to scan QR codes.
This is a one-time permission to allow use of the camera which can always be revoked at a later time.
Press the Allow button.
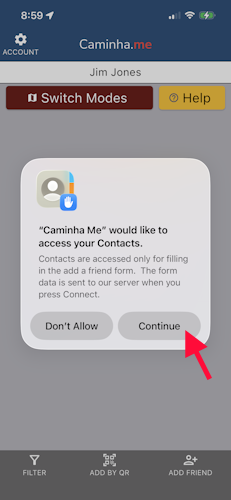
Contacts Permissions
Using your contacts is a convenient way to connect with the important people in your life.
This is a one-time permission to allow access to your contacts which can always be revoked at a later time.
Your contacts are never sent to our servers.
They are only used to fill in the connect form.
You can always choose to deny access.
The connect form will still work but will require you to enter the information manually.
Press the Continue button.

Connect with Friend by QR Code
There are two ways to add friends to your list of connections.
- QR Code
- Connect Form
The QR method is the easiest but requires having access to your friend's QR code.
Press the Add By QR button to start the scanner.
The next three slides will show you where to find the QR code for a friend.
Connect by QR - Step 1
Every Caminha.me account has an identifier which is also displayed as a QR code.
Press the Account button on your friend's phone to find their QR code.

Connect by QR - Step 2
The account page will slide out from the left like the image displayed.
Open the identifier area by pressing on the arrow icon.
You can now scan the QR code.
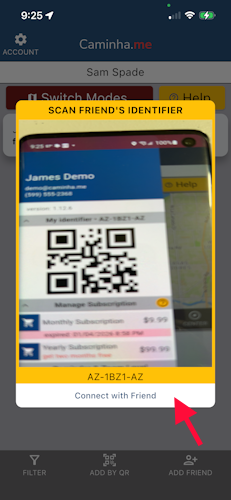
Connect by QR - Step 3
Then scan your friend's QR code with your phone. This will add them to your list of connections.
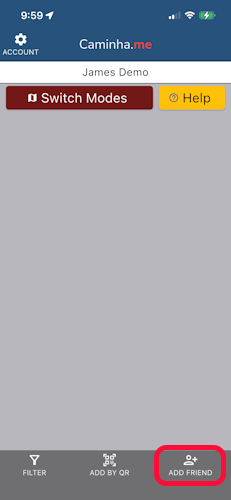
Connect with Friend by Form
The second way to add friends is through the Connect Form.
The Connect Form has a manual way and a convenient way.
Press the Add Friend button will display a form as shown in the next slide.

Connect by Form
Manual - Directly enter your friend's contact information into the appropriate boxes or have your friend send you their identifier and enter it into its appropriate boxes.
Once you have entered all of the information correctly:
Press the Connect button.
Convenient - If you gave permission for Caminha.me to access your contacts, you will have a list of contacts displayed under the boxes.
You can filter the contacts list by entering part of the first or last names in the boxes.
Tapping a contact will automatically fill in the boxes.
Once you have tapped the contact you want:
Press the Connect button.
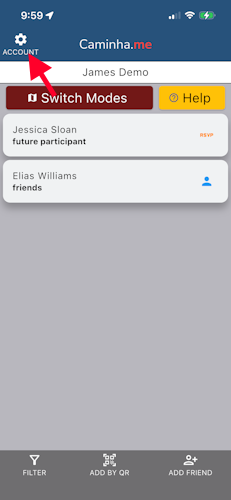
Connection List
There are two types of friends added to Caminha.me.
Future Participant - people not currently using the app.
Friend - people already using the app.
See below in Connection Details for more information on the connection and friend pages.
Connection Details

Connection List
There are two types of friends added to Caminha.me.
Future Participant - people not currently using the app.
Friend - people already using the app.
Tapping the connection card will open that card's details.
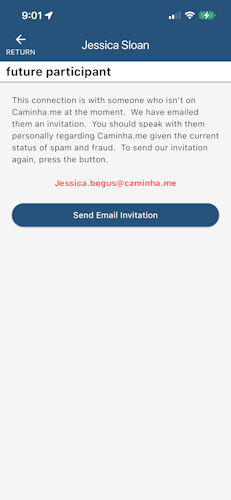
Connected to Future Participant
This is a Future Participant detail page. You can resend our invitation to your friend from this page. Due to the abundance of spam, I would recommend you reach out to them directly after sending the invitation. Most people ignore emails they do not expect.
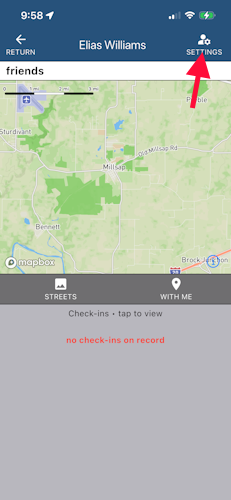
Friend Page
This is a Friend detail page.
Here, you can see their check-ins.
Tapping on a check-in will show their location on the map.
The Friend Settings are covered on the next slide.
Press the Settings button.
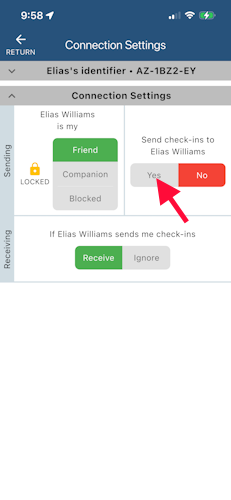
Friend Settings
The Friend Settings is where you control your interactions with this connection.
We believe in your privacy; you control who receives your information.
By default, your check-ins are not sent to new connections.
You must opt-in and select Yes to send your check-ins to your friends.
To send them check-ins, press the Yes button.
To stop sending check-ins, press the No button.
By default, you receive check-ins from your friends but you can change this at any time.
Also on this page, you can change your connection to Friend, Companion or Blocked.
At the top of the page, you can tap on the arrow button to see the QR code of their identifier.